It has now never been easier to backup, restore and monitor backup operations of Microsoft Azure workloads thanks to Public Cloud Integration via VSPC.
With our Veeam Backup for Azure appliance, integrated with the Veeam Service Provider Console (VSPC) you can backup the following workloads to our secure blob storage via one single pane of glass.
- Azure VMs.
- Azure Virtual Networks.
- Azure SQL.
- Azure Cosmos DB.
- Azure File Shares/Storage Accounts.
After a very quick authentication process to get your Azure Tenant communicating with our Backup Appliance you can start protecting your Azure services.
The how-to below covers creating a backup policy and a simple restore scenario.
1. Once we have assigned Azure Services to your VSPC account you can login and go to Backup Jobs, from there you backup Azure VM’s under Virtual Machines > Public Clouds. Azure Files and Storage Accounts under Data Backup. Azure SQL and Azure Cosmos DB under Cloud Databases. For this guide we will cover VM backup.
2. Under Backup Jobs > Virtual Machines > Public Clouds. Select Create Policy.
3. In the window that opens will be Vitanium’s Backup appliance. Veeam-azure01
4. Select then click Create.
5. You will be taken to the Veeam Backup for Microsoft Azure plugin
6. Create a new Backup Policy Name
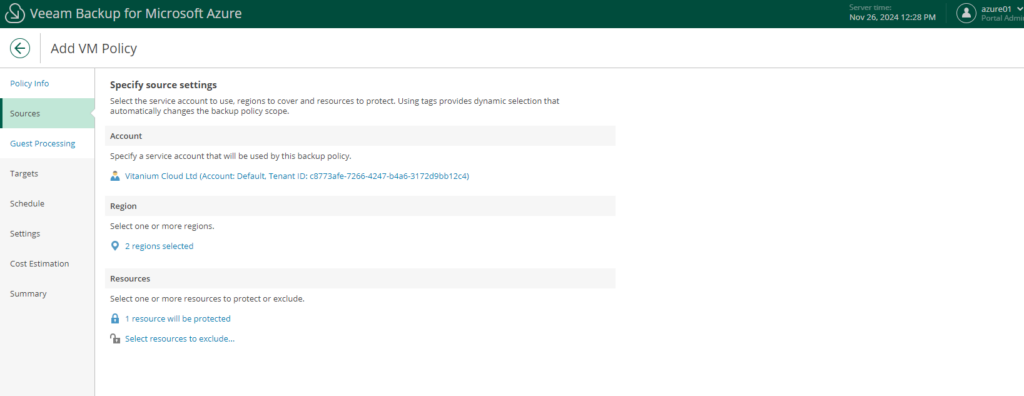
7. Select a service account, region to protect (depending on where your services are deployed) and resources to protect or exclude. You can select items by bulk categorised by Subscription, Resource Group, Tags
8. Next is Guest Processing. This allows for application aware snapshots for certain software.
9. On the targets tab you will need to Switch on Enable Backups.

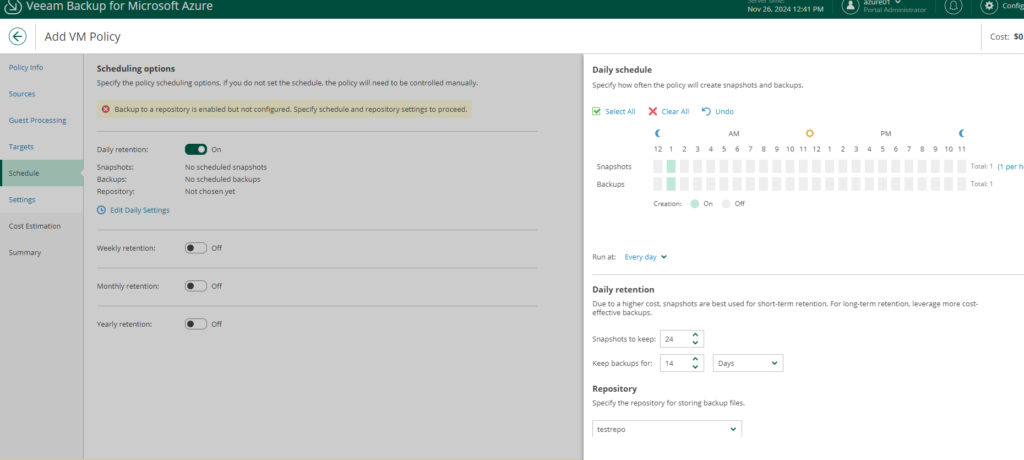
10. Now we can create schedules for backups and snapshots. You have the option to keep GFS restore points. As you can see below, I have selected to take backups at 1AM daily with a retention of 14 days with no GFS retention. You will be able to select the repository we assign to your company.
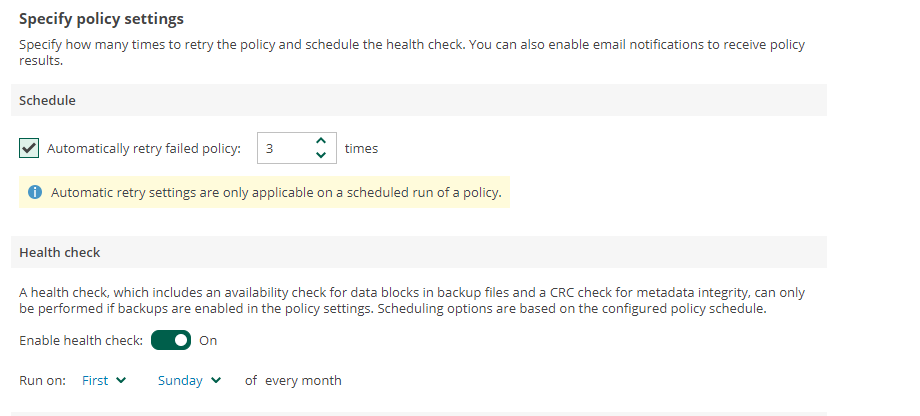
11. On the settings tab is where you can set amount of retries after a failed job and set a scheduled health check on your backups.
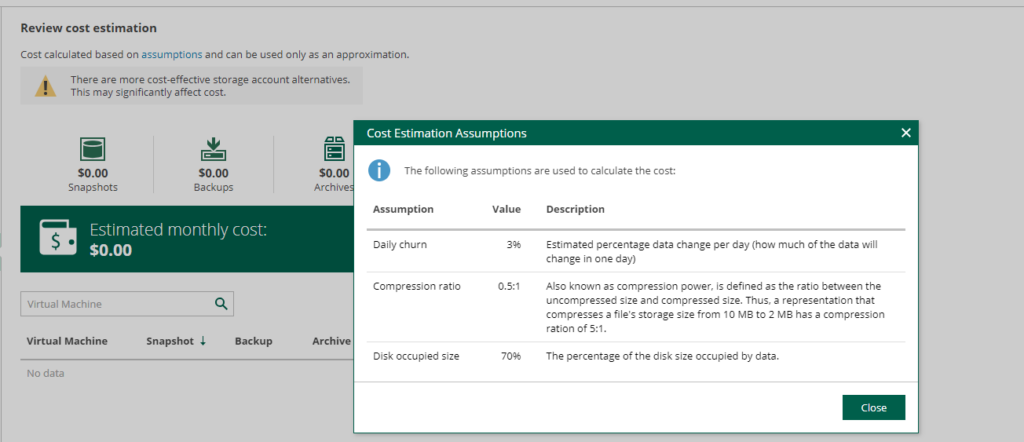
12. Next is the cost estimation. It uses the below assumptions to calculate cost. Egress and traffic fees are only incurred if our backup repository is in a different region to your resources. Backup and Snapshot operation fees are carried out by our backup appliance so are charged to Vitanium.
13. Finally is summary then completion. You will now see the backup job listed in your VSPC jobs list. For a guide on using the VSPC, working with alarms and notifications please see here: https://vitanium.com/new-feature-veeam-service-provider-console/

How to Restore
You can also run simple restores of Azure VM’s File Shares and Cloud Databases through the VSPC. Focusing on Azure VM’s You have the ability to restore the whole VM, Individual Disks or File Level Restores. The guide below covers a restore of a whole VM.
1. To kick off a restore in the Service Provider Console, select protected data > Virtuam Machines > Public Clouds. Highlight the Azure VM you wish to restore then the Restore icon:

2. In the restore menu, select Instance Restore:
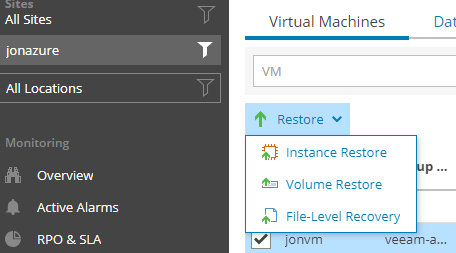
3. You will again be taken to the appliance plugin, Specify the VM you wish to restore and select a restore point from either a snapshot or a backup to our repository.

4. In the next tab you will need to specify the administrator account for the restore.
5. Next you will need to confirm the restore mode, currently through the plugin you can restore back to the original location or to a different subscription/region under the same Azure account with the ability to change Network and Disk settings. I have selected to restore back to the same location.
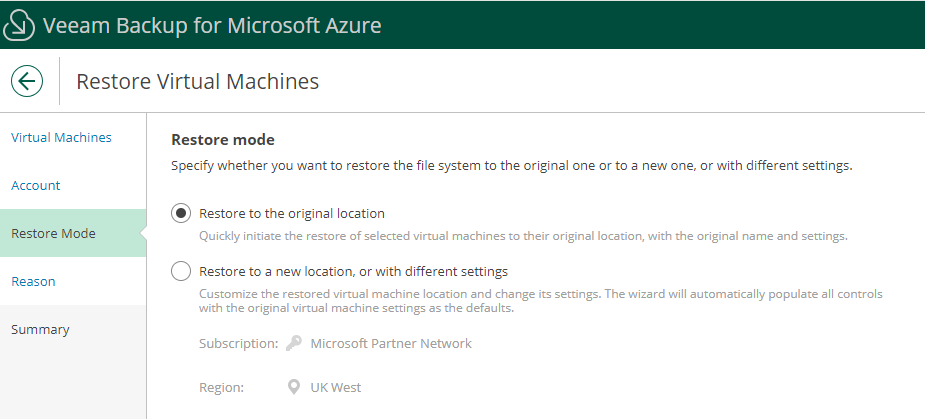
6. After confirming the reason to restore and reviewing the summary. The restore will begin.
If you have any questions regarding our managed Azure backup offering please call on 0345 258 1500.

