As the demand for more local storage grows, it is increasingly common for us to have conversations with businesses that have an on-site NAS device surpassing 20TB of data. Ensuring this mass of company data is protected from the growing number of threats to businesses can seem like a daunting challenge. However, utilising built-in Synology solutions and Vitanium’s object storage provides a simple and reliable solution.
The most common question asked by new customers is always related to the first phase of the backup, the initial upload. Deciding whether to ‘seed-load’ the data or upload over the internet can help ensure this process is completed as efficiently as possible. This guide assists you with making the correct decision and explains the steps required for both possible options.
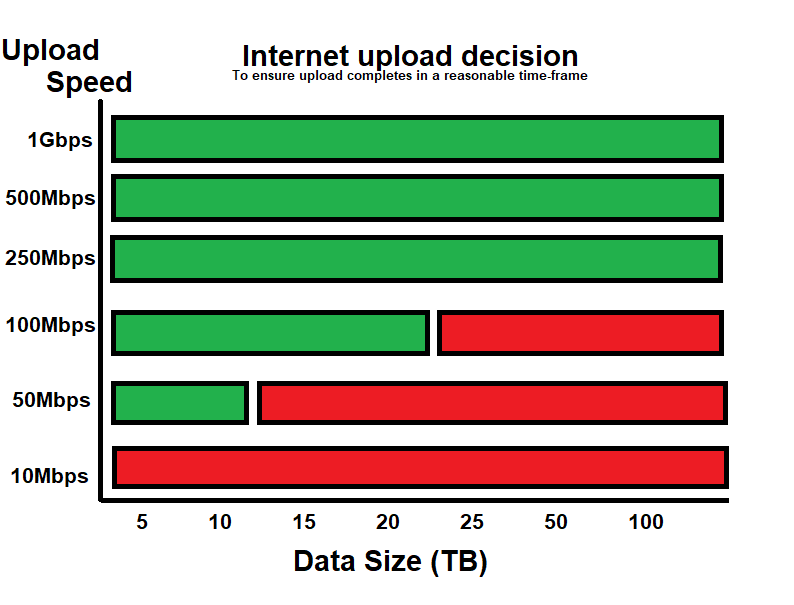
Uploading Data Over the Internet
Indisputably the simplest and usually most cost-effective method of upload, is over the internet. We recommend uploading the initial backup over the internet if you fall into the below green ‘zones’. A seed-load, explained further below, will likely be more suitable for slower connections trying to backup large amounts of data:
Once you have an S3 storage plan with Vitanium, the guide HERE should be followed to create your backup job. You can simply allow the job to run through until completion and complete the initial upload to our cloud storage. Once complete, simply leave the job to run incrementally on schedule going forward.
Using an External Drive (Seed-load)
Customers with slower connections and larger data sets (highlighted in red in the previous graph), will likely consider a seed-load to remove the impact on the network of the initial upload. A local USB drive is used to obtain a copy of the data, which is then posted to us. We then copy the data to our storage locally and return your drive. Vitanium can also supply seed-load drives to customers.
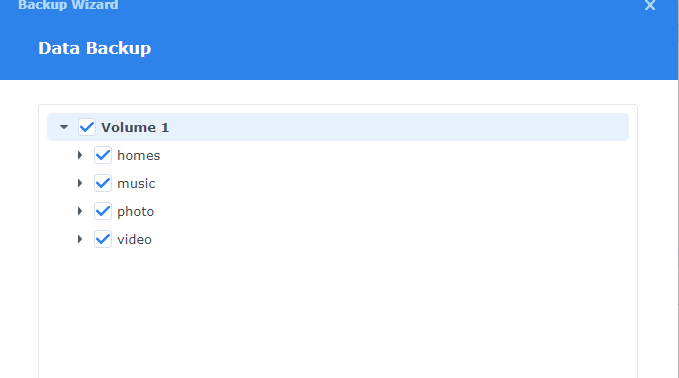
The below steps should be followed to seed-load data from a Synology NAS:
- Open the Synology NAS and start the ‘Hyper Backup’ application. Click the + icon at the top left corner and select Data backup task to launch the backup wizard.

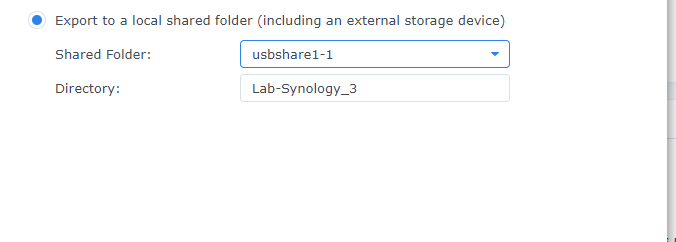
- Set the backup destination to S3 Storage storage and fill out the required details. Once completed select the option Export to a local shared folder… (This will clear the previously input details) and select the external USB device.

- Follow the wizard, selecting the shared folder(s) required by the backup.
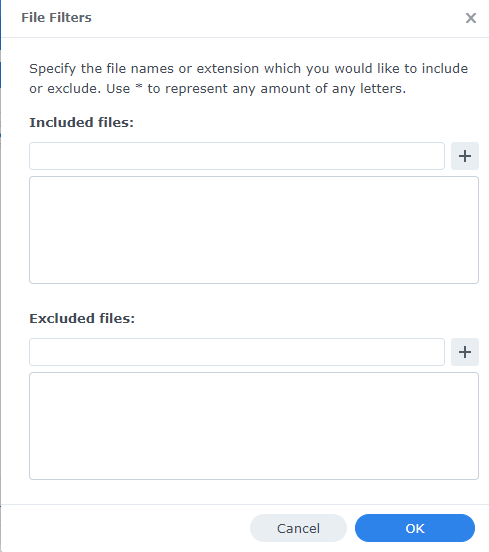
- Create a file filter if required.

- Select the option to Remove destination external device…
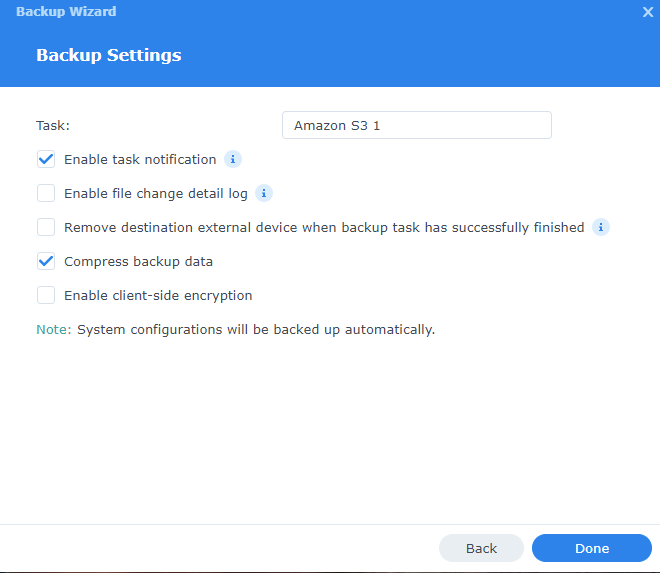
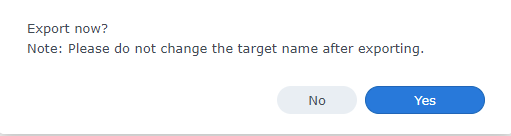
- Select Done and then Yes to export the data to the external drive.
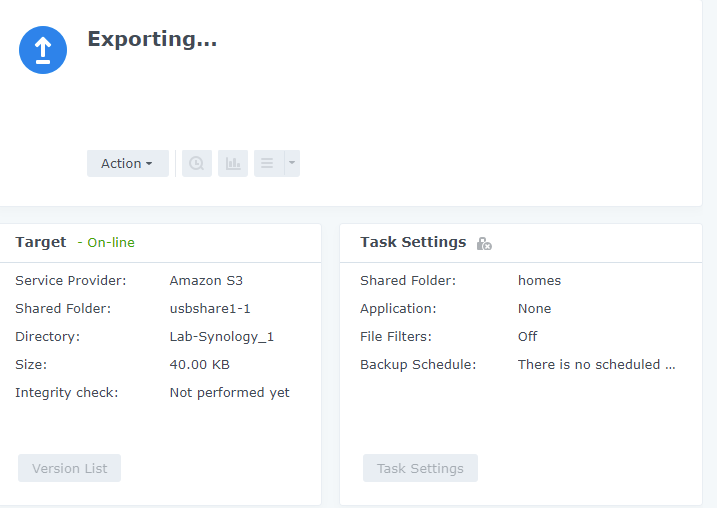
- Send the storage device to us. Once we have given confirmation the data has been copied into our S3 storage platform, go to the backup job in Hyper Backup and select the Relink now button.
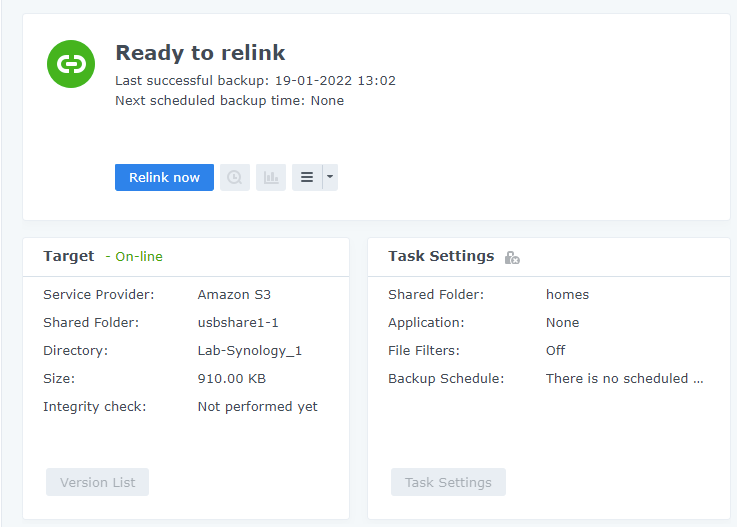
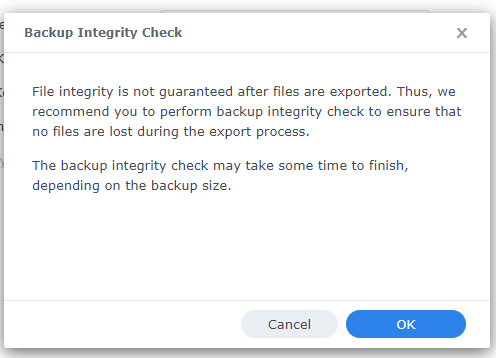
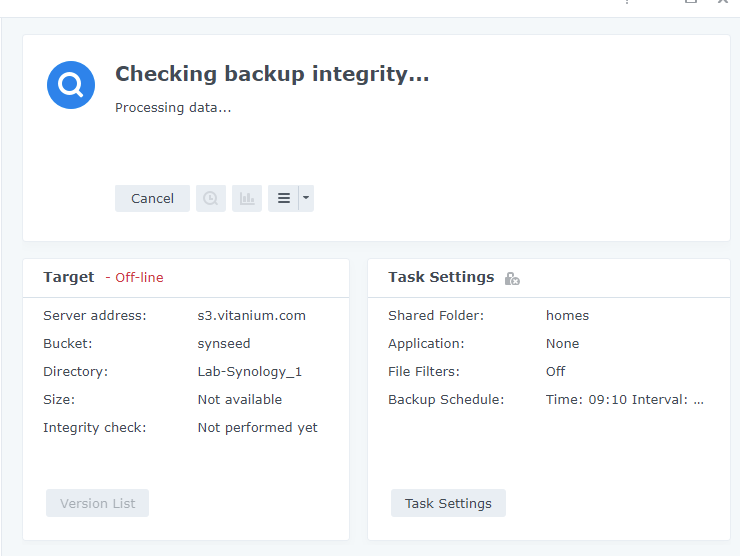
- Follow the relinking wizard instructions to complete the seed-load. Ensure you select the option to complete a Backup Integrity Check
Conclusion
With the national rollout of fibre for businesses, it is now more uncommon to find a business that does not have a 100Mbps or faster internet connection. As a result, it is now easier than ever to upload a complete copy of your on-site data to the cloud, even with double-digit TB’s of data. If you happen to be a business without a fast internet connection and still require an off-site backup, we also have a solution to meet your needs.
If you’d like further information on how best to protect your data, give us a call on 44 (0)345 258 1500 and we’ll be happy to advise you. Alternatively, you can use our Contact Page – Vitanium.