Datahive (OBM) is the perfect software for backing up and protecting your Office 365 user accounts. You can use Datahive to backup individual emails, contacts, calendars and more in Office 365 Outlook. It can also be used to backup OneDrive and SharePoint, including snapshots / versioning, with a retention policy to protect items that you may have accidentally deleted from your Office 365 user account.
This guide will show you how to easily select the contents in your Office 365 domain to backup to your preferred destinations through the Datahive client agent.
System Architecture
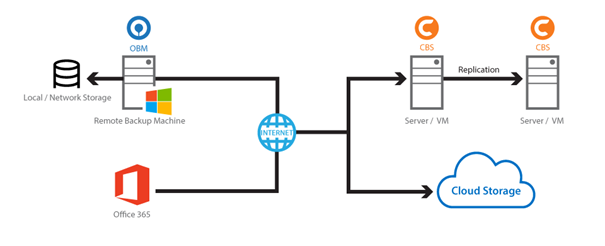
The latest version of Datahive is installed on the remote backup machine which is connected to Office 365 and CBS backup server through internet.
Preparations
Before creating your backup, please ensure you have granted the following permissions.
Granting Permission to Accounts to Create Backup Sets
Before the Office 365 account administrator or other accounts can create a backup set, the administrator has to grant permission to the account(s) which are going to create the backup sets. The account must be a member of the following security groups:
- Discovery Management
- Public Folder Management
Granting Permission for Application Impersonation & Mail Search
This permission allows users added under the Members section of the Discovery Management group to back up and/or restore user item(s) not only for their own account, but also the accounts of other users in the same Members section. To grant permission for this feature, you will need to add the Application Impersonation & Mail Search role.
Granting Permission for SharePoint Global Admin
The Global Admin permissions will allow a SharePoint account to list other accounts’ Personal Site and OneDrive in the backup source tree. So before using Datahive to create backup sets, please ensure the SharePoint account already has permissions in order to use Datahive to back up and/or restore user item(s), not only for their own account, but also the accounts of other users.
Creating a Backup Set on Datahive
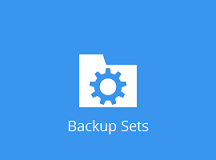
- In the Datahive main interface, click Backup Sets.
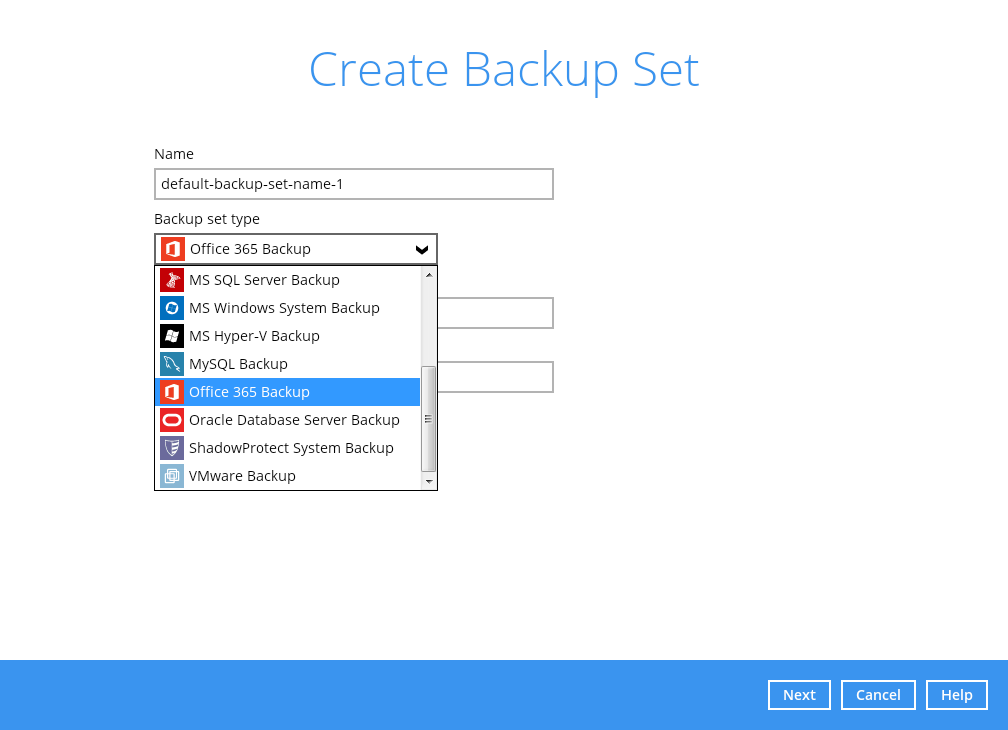
- Click the “+” icon next to Add new backup set.
- Enter a Name for your backup set and select Office 365 Backup as the Backup set type.
- Enter the user name and password of your Office 365 account, choose the region for the account and then press Test to validate the account.
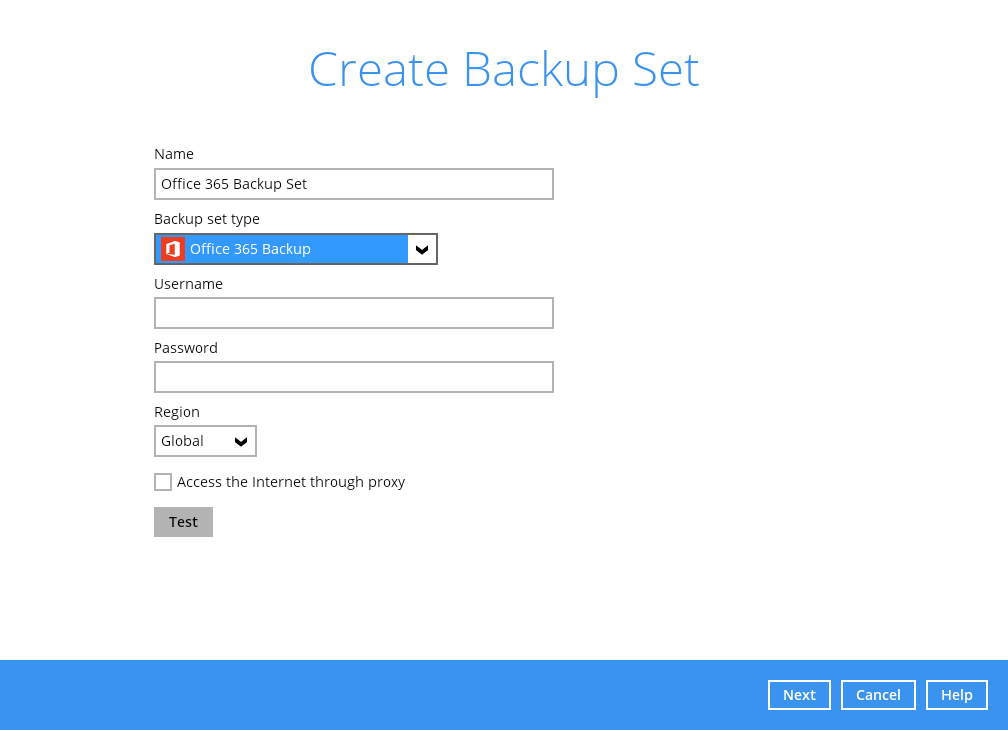
- Test completed successfully shows when the validation is successful. Press Next to proceed to the next step.
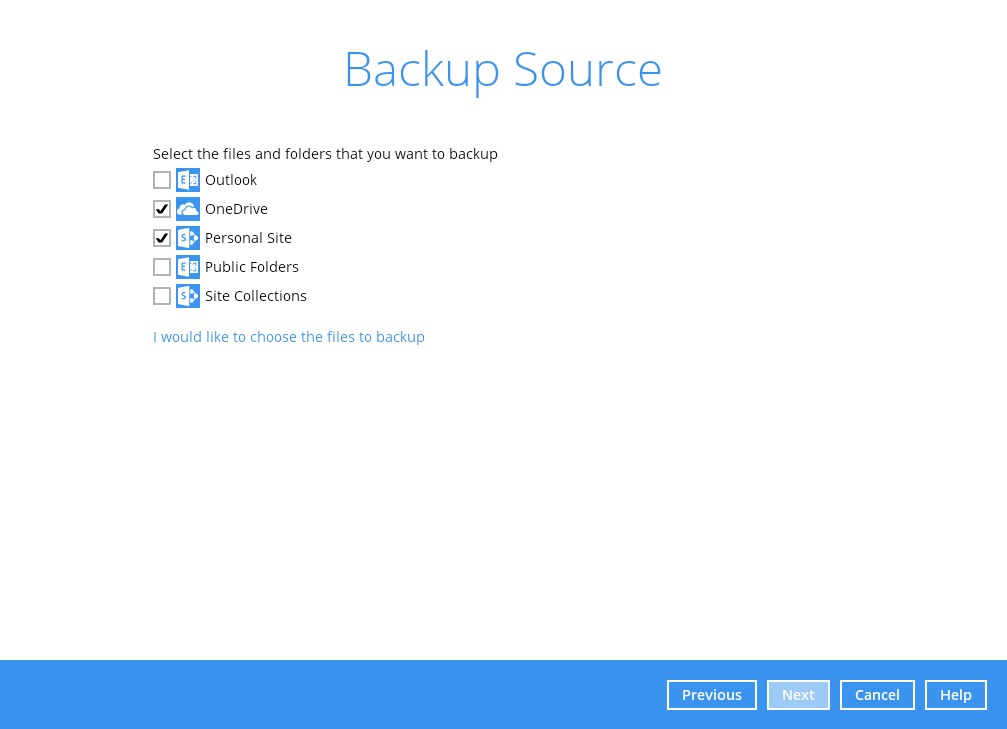
- In the Backup Source menu, select the desired Outlook, OneDrive, Personal Site, Public Folders or Site Collections for backup. Checking the box will back up everything in that section, for example, checking the box for Outlook will back up the mailboxes of all the users.
 Or click I would like to choose the files to backup to choose the detailed items to backup. Enable the Show mails checkbox at the bottom left corner if you would like to choose individual items for backup.
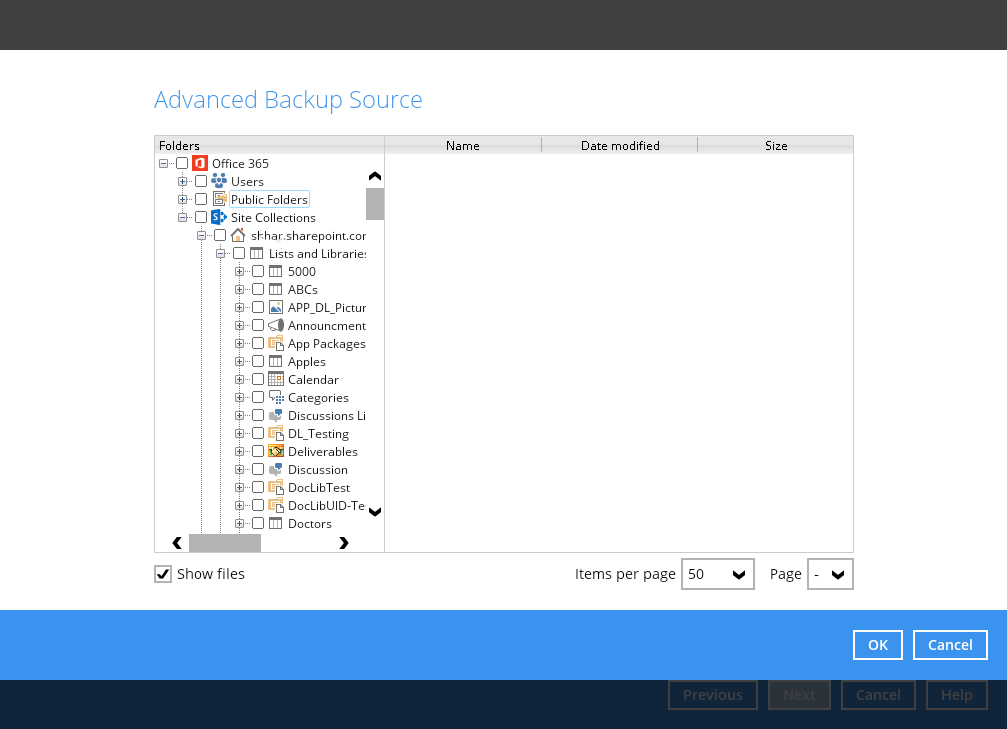
- Users: This includes Outlook, OneDrive and Personal Sites
- Public Folders: This includes public folders
- Site Collections: This includes Personal Sites and Site Collections
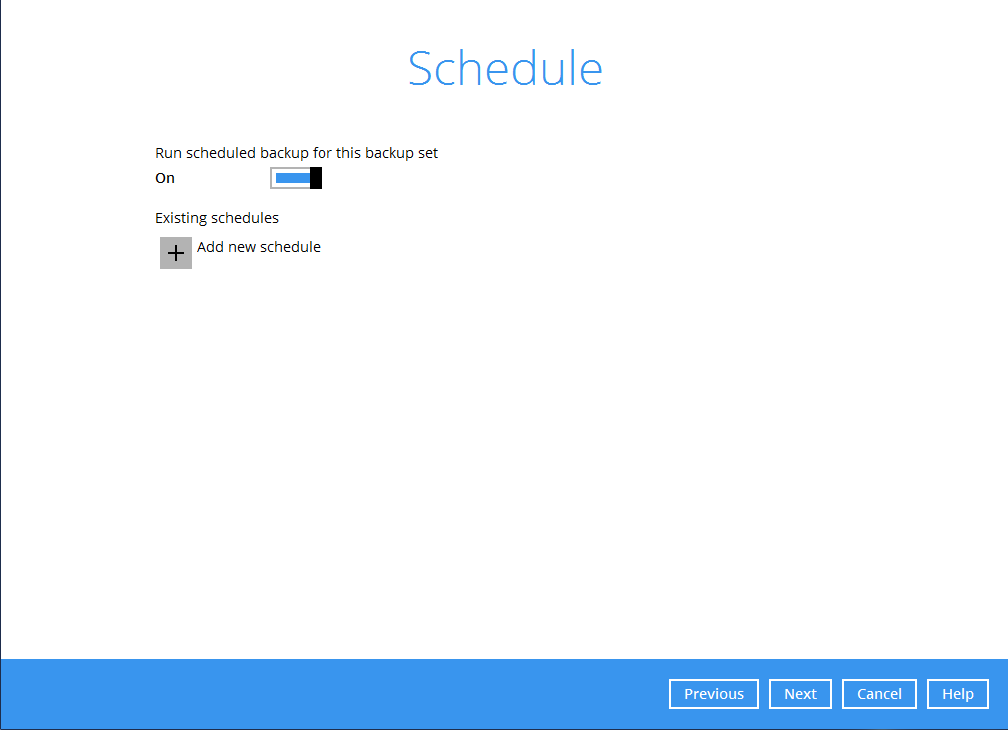
- In the Schedule menu, configure a backup schedule for a backup job to run automatically at your specified time interval. Slide the on/off button to turn on this feature, then click Add new schedule to add a new schedule, then click Next to proceed.
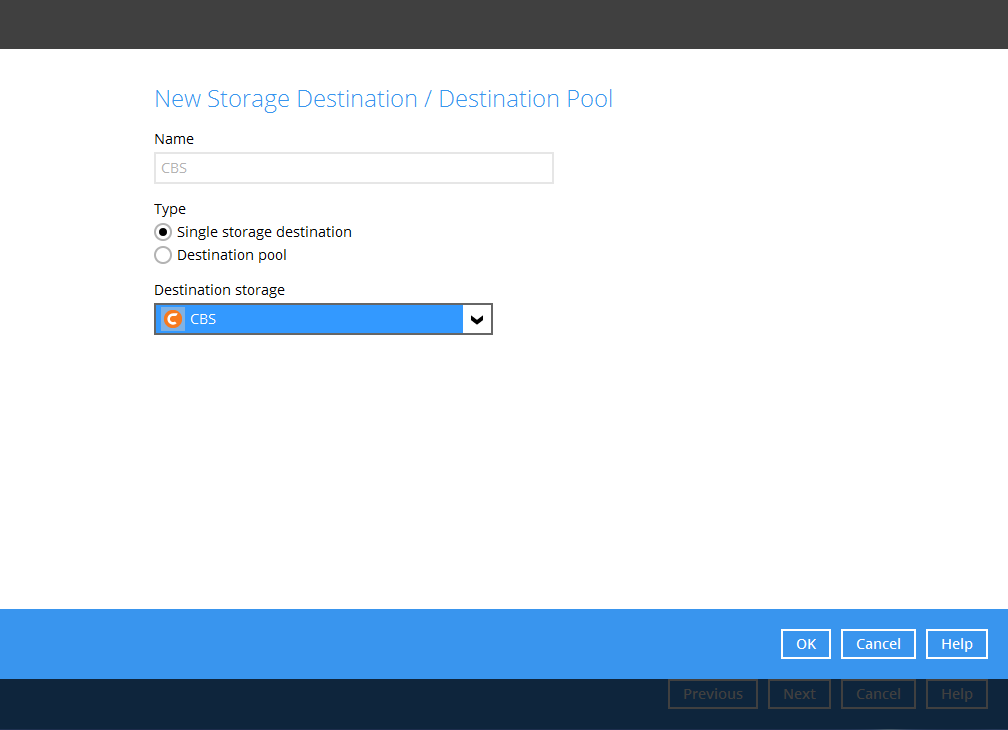
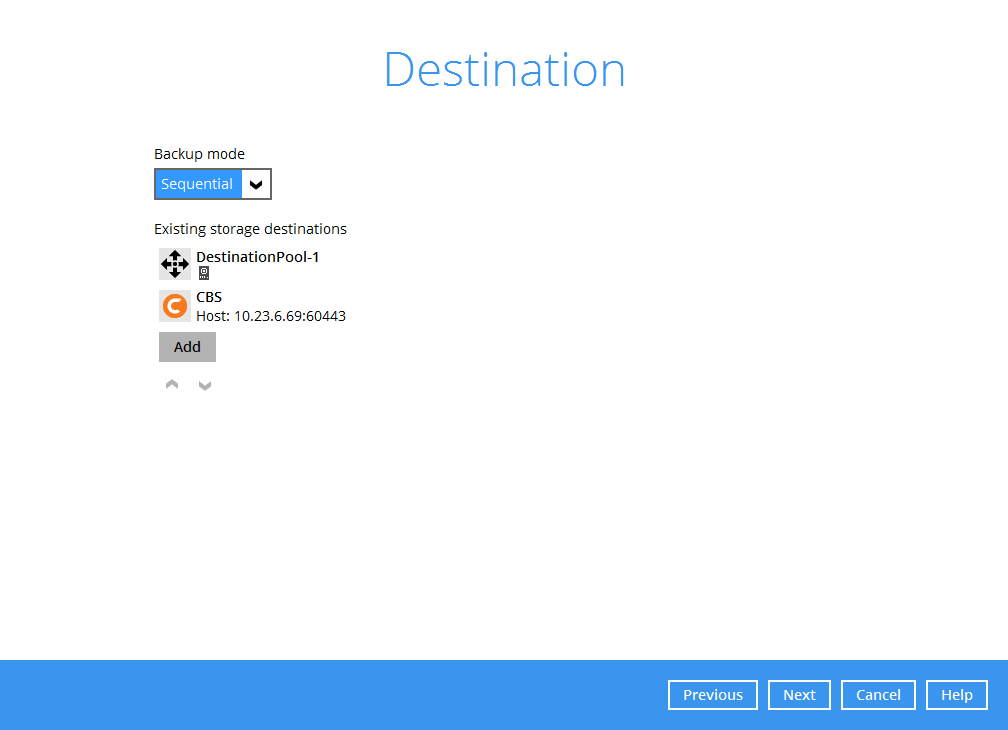
- In the Destination menu, select a backup destination where the backup data will be stored. Click the “+” icon next to Add new storage destination / destination pool.
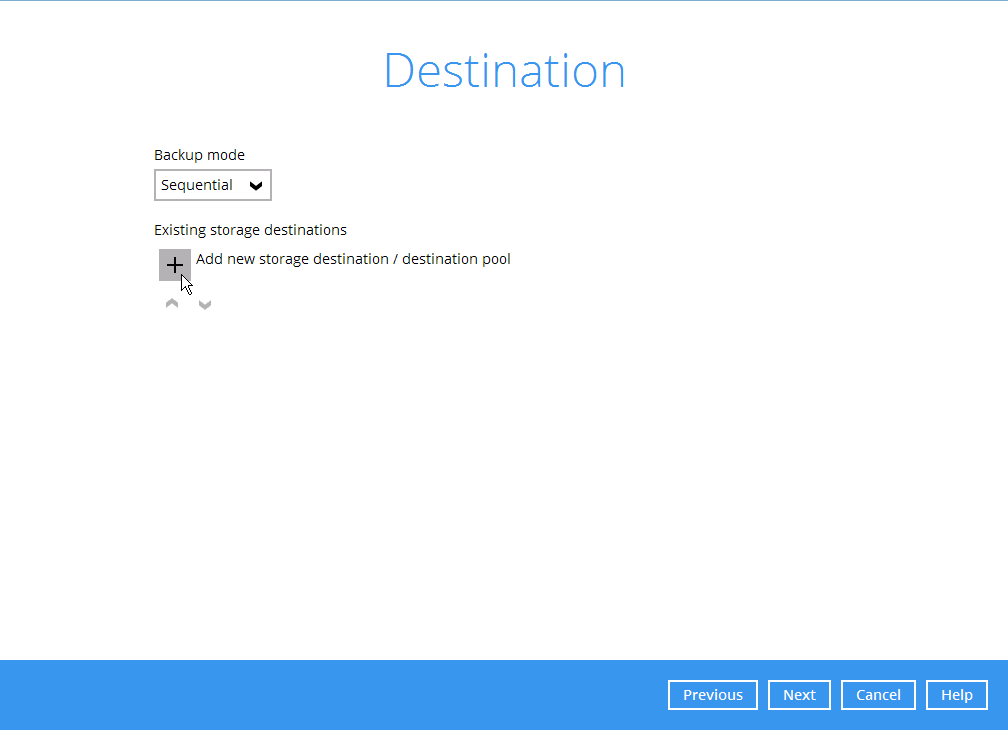
- Select the storage type.
- Single storage destination – the entire backup will be uploaded to a single destination you selected under the Destination storage drop-down list. By default, the destination storage is selected as CBS.
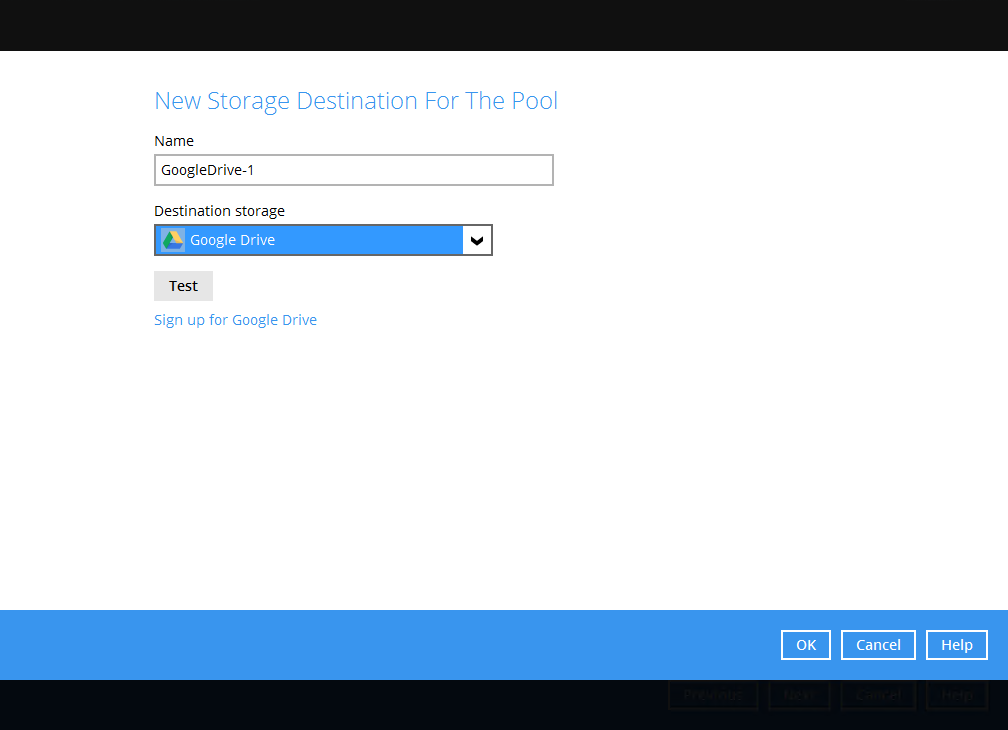
- Destination pool – the backup will be spread over the destinations you have selected. Enter a Name for the destination pool and then click Add new storage destination to the pool to select the desired storage destinations.
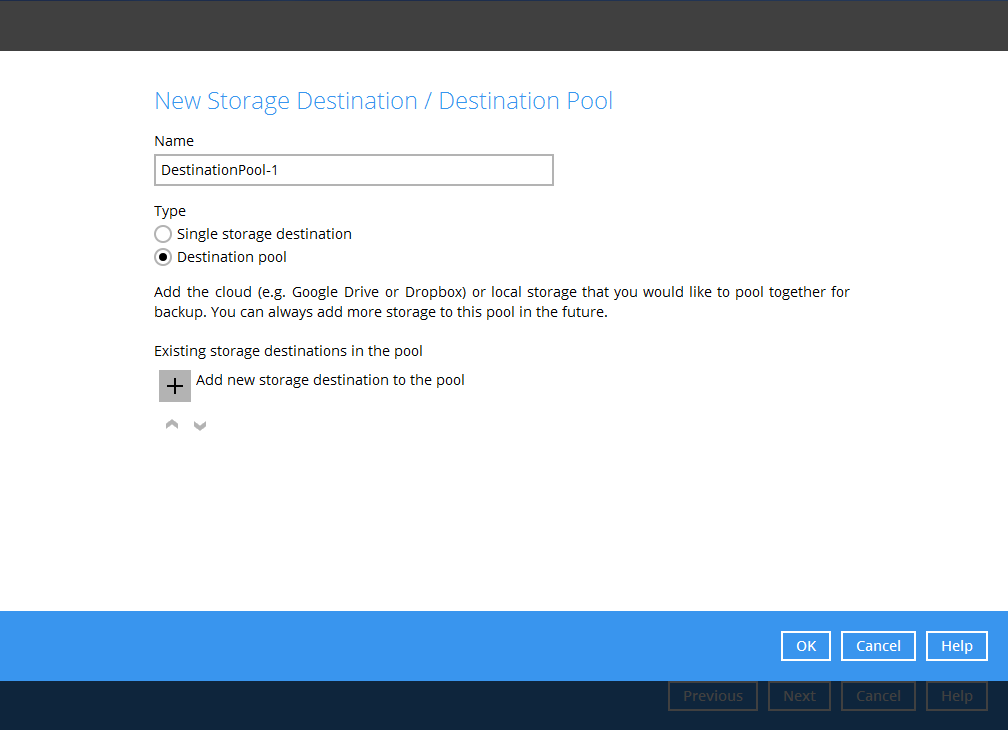
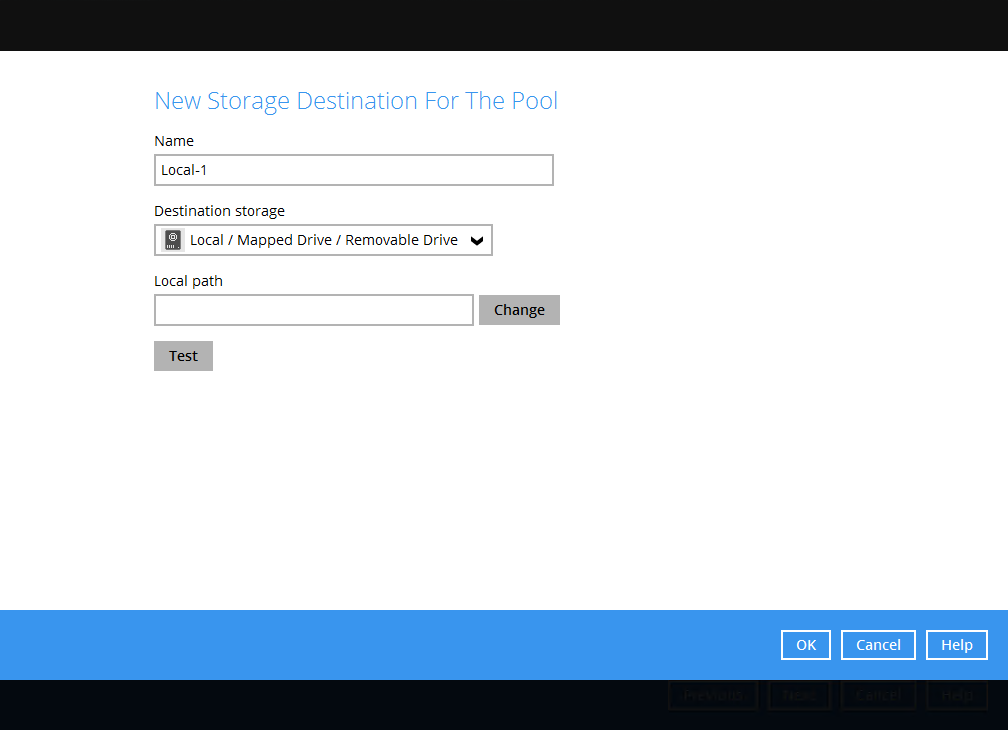
- You can choose a storage combination of the Local/Mapped drive/Removable Drive, Cloud storage or FTP. Click OK to proceed when you are done with the settings.Note:
- If you have chosen the Local/Mapped Drive/Removable Drive option, click Change to browse to a directory path where backup data will be stored, then click Test to validate the path. Test completed successfully shows when the validation is complete.
- If you have chosen the Cloud Storage, click Test to log in to the corresponding cloud storage service.
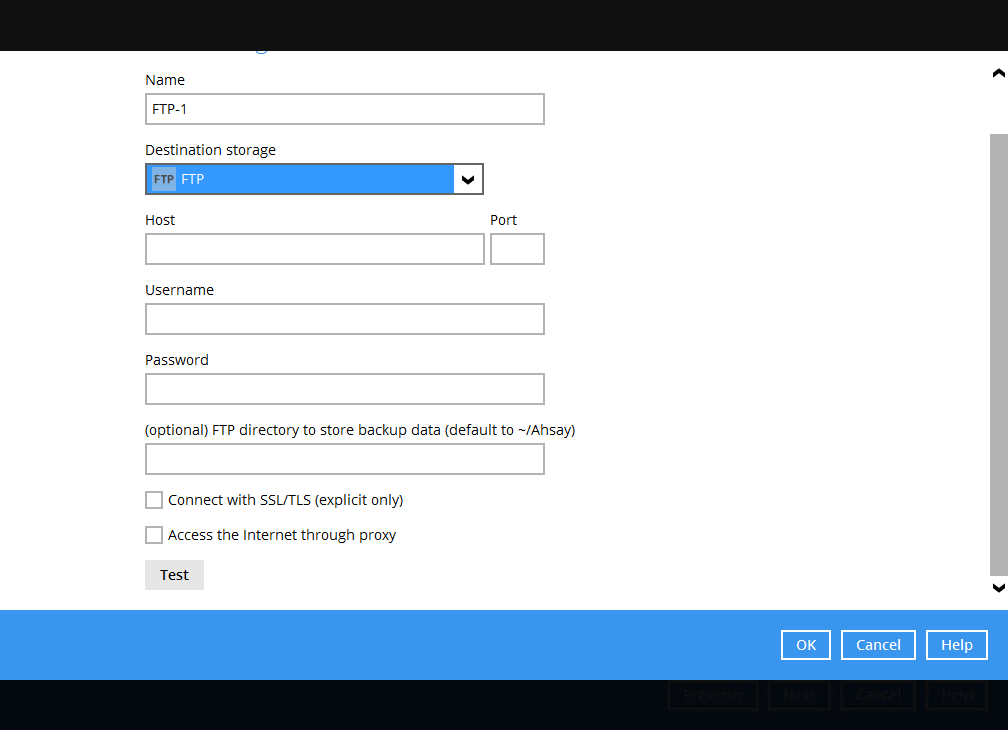
- If you have chosen FTP as the destination, enter the Host, Username and Password details.
- Single storage destination – the entire backup will be uploaded to a single destination you selected under the Destination storage drop-down list. By default, the destination storage is selected as CBS.
- You can add multiple storage destinations. The backup data will be uploaded to all the destinations you have selected in the order you added them. Press the icon to alter the order. Click Next to proceed when you are done with the selection.
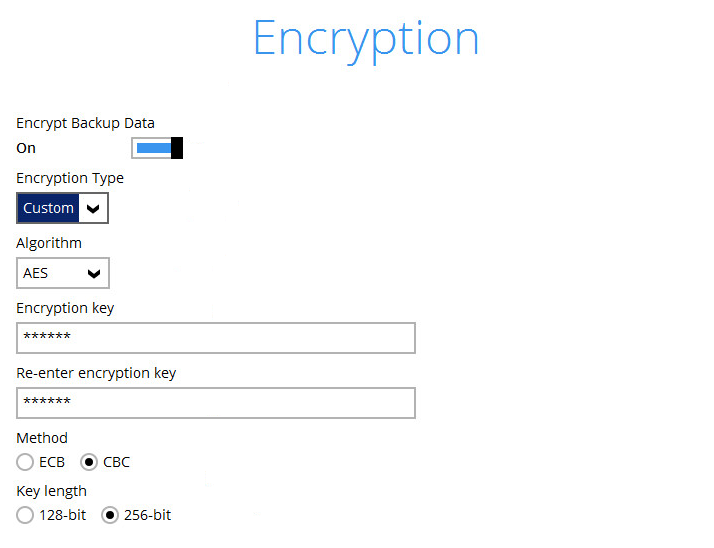
- In the Encryption window, the default Encrypt Backup Data option is enabled with an encryption key preset by the system which provides the most secure protection.
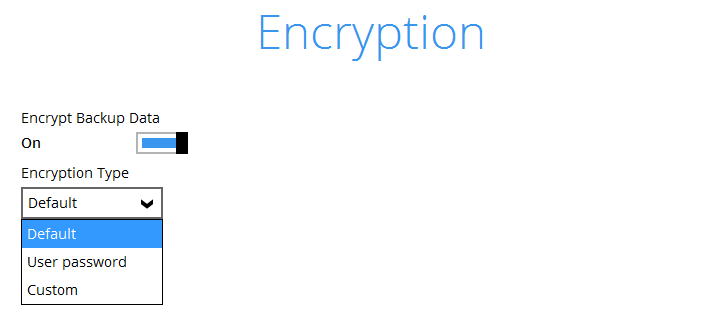
You can choose from one of the following three Encryption Type options:
- Default – an encryption key with 44 alphanumeric characters will be randomly generated by the system
- User password – the encryption key will be the same as your Datahive login at the time when this backup set is created. Please be reminded that if you change the Datahive login password later, the encryption keys of the backup sets previously created with this encryption type will remain unchanged.
- Custom – you can customise your encryption key, where you can set your own algorithm, encryption key, method and key length. Click Next when you are done.
12. If you have enabled the Encryption Key feature in the previous step, the following pop-up window shows, no matter which encryption type you have selected.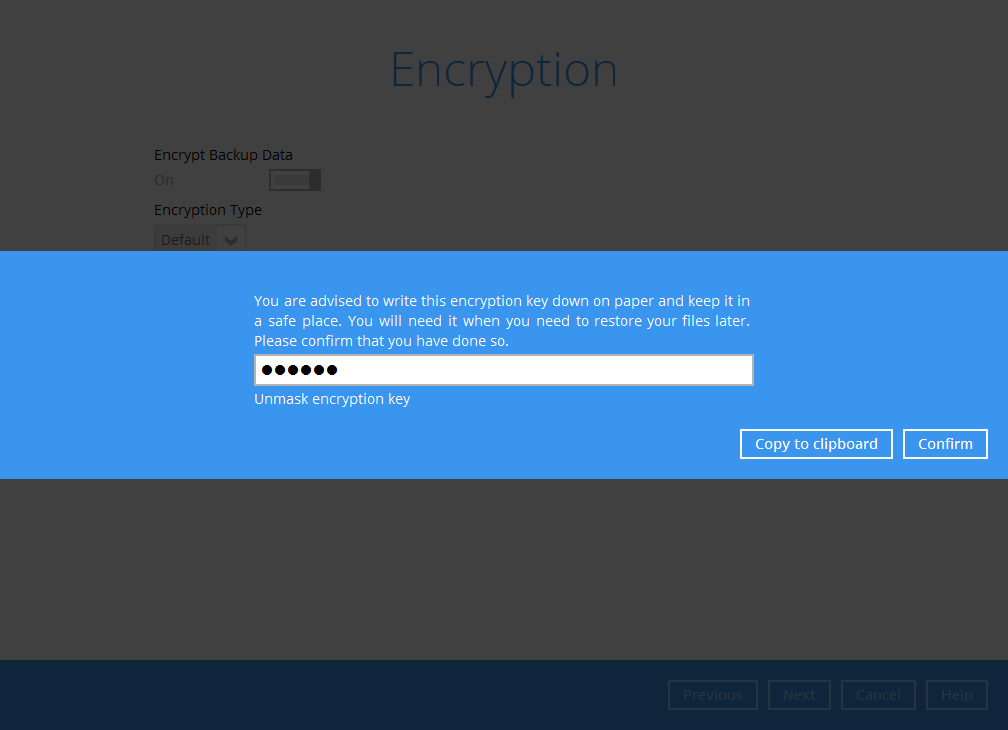
The pop-up window has the following three options to choose from:
- Unmask encryption key – The encryption key is masked by default. Click this option to show the encryption key.
- Copy to clipboard – Click to copy the encryption key, then you can paste it in another location of your choice.
- Confirm – Click to exit this pop-up window and proceed to the next step.
13. If you have enabled the scheduled backup option, you will be prompted to enter the User Name and Password of the Windows account that will be running the backup.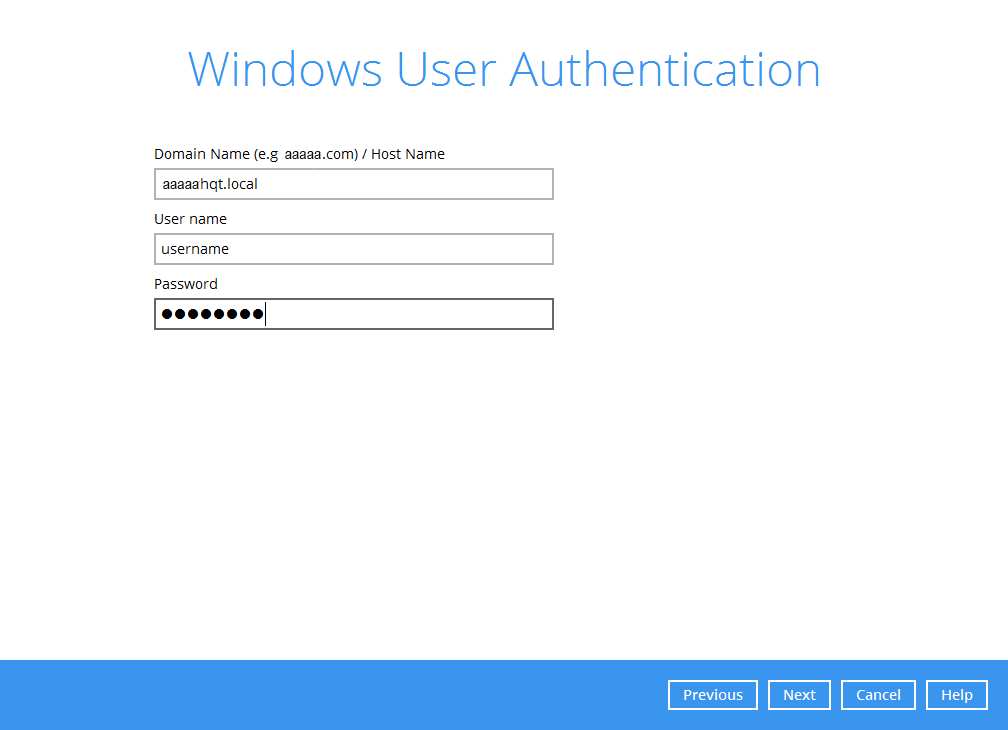
Click Next to create the backup set.
The following screen is displayed when the new Office 365 backup set is created successfully. Backup will be run according to your defined schedules. You can now click “Backup Now” to manually trigger a backup.