
How often do you test your backups? The ideal answer is every day, so that you can be 100% certain if you ever needed to restore, the backup is valid and restorable.
In the real world, it’s simply not possible to manually test every single backup for every machine, as it would require a disproportionate amount of time for most businesses. Even manually testing weekly or monthly is better than never, but leaves 6 days in the week, or 29 days in an average month where backups are untested!
Luckily, Veeam Backup & Replication has a feature that addresses this, known as SureBackup. This feature allows scheduled boot ups of the backed up VM’s in a sandbox environment which are then automatically verified without any manual processes.
On top of that, Veeam can also optionally scan the backups for silent data corruption and malware before they are booted for extra peace of mind.
The SureBackup Process
At a high level, the SureBackup process works by running the steps below:
- Veeam publishes the selected VM’s from the backup repository by streaming the data from the backup files.
- The VM’s are booted in an isolated environment from production
- Veeam performs a number of automatic tests – heartbeat and ping by default, custom scripts can be configured.
- Veeam shuts down the isolated VMs and stops publishing them.
- A SureBackup report is sent using the same details as the standard backup reports.
SureBackup Setup
SureBackup is split into 3 parts:
- Virtual Lab – The isolated environment Veeam uses to verify the backups, which runs as a small VM on one of your hosts.
- Application group – A group of VM’s that may be dependent on each other and need to be tested together. E.g. Exchange, Domain Controller and DNS servers
- SureBackup Job – A task which ties the above together, by starting the VMs in the application group on the Virtual Lab on a specific schedule.
In order to configure the SureBackup job, follow the steps below.
Virtual Lab
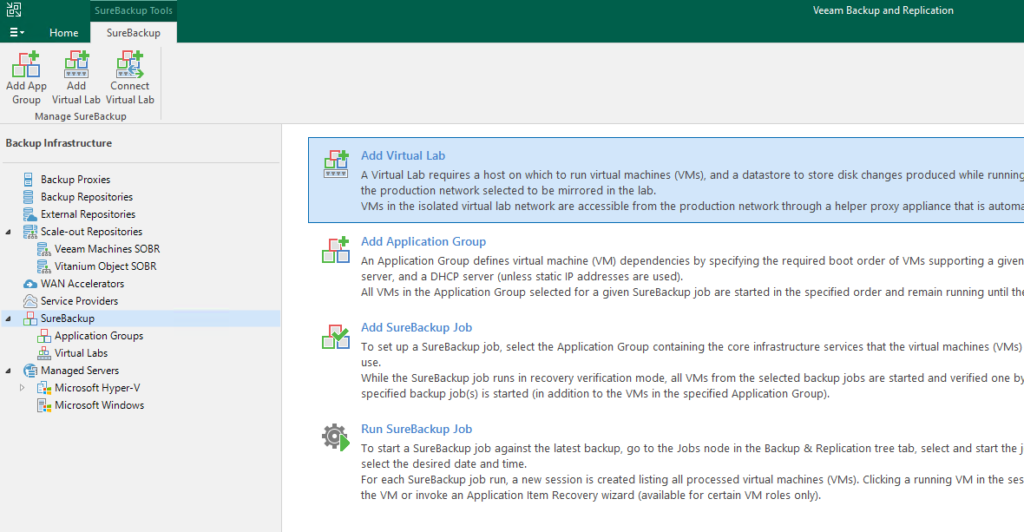
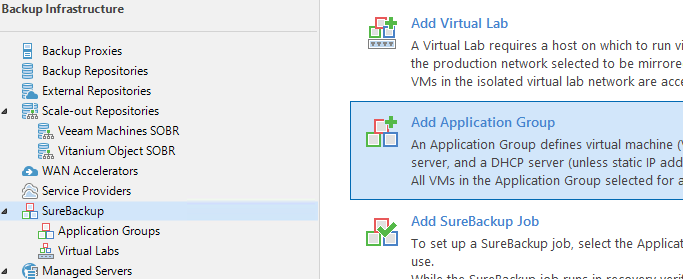
- Open the Veeam Backup & Replication Console, navigate to Backup Infrastructure -> Sure Backup
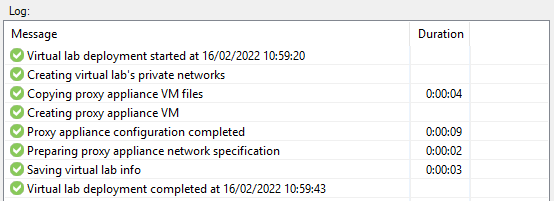
- Select Add Virtual Lab in the first instance:
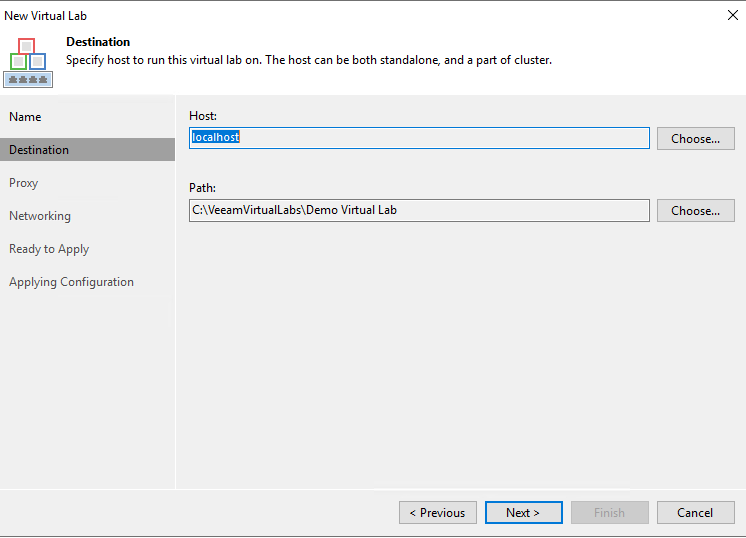
- On the wizard, give the lab a name, and choose a host and path for it to be deployed on.
- On the Proxy screen, enable the tick box to ‘Use Proxy Appliance’. This allows the Veeam B&R server to talk to the sandbox environment to perform recovery verifications.
- Select a virtual switch and/or production IP details for this appliance to be deployed with.
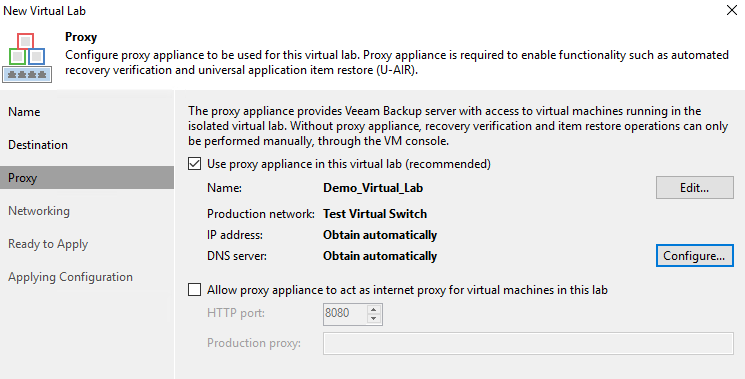
- If the VM’s require internet access, this can be proxied through the appliance as well using the bottom tick box.
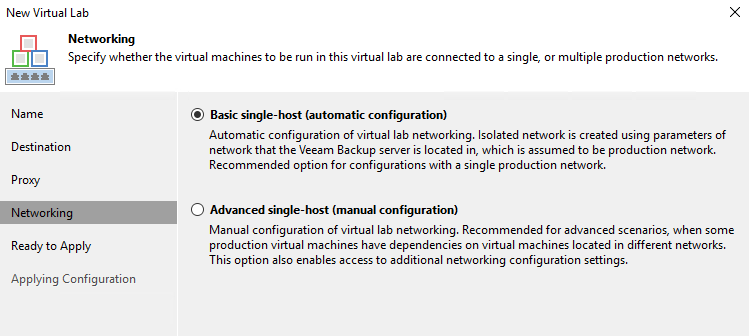
- On the networking tab, leave the setting on Basic single-host if all VM’s to be tested exist in the same production network. If multiple networks are in use, they can be manually mapped by selecting the advanced tab.
- Select Next and then Apply. This will deploy the Virtual Lab appliance onto the selected host.
Application Group
- Return to Backup Infrastructure -> Sure Backup and choose Add Application Group
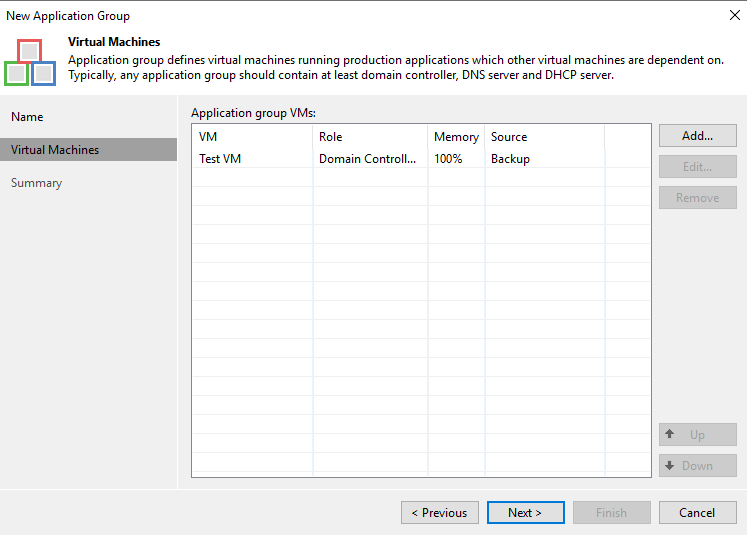
- Give the group a meaningful name, and then add all VM’s that are to be tested together. For example, Exchange, DNS and DC servers. Use the Up/Down buttons to specify an appropriate order for the machines to boot (e.g. DNS prior to DC or Exchange VM’s).
- Each VM can have it’s role specified to ensure the correct tests are applied, by selecting the VM and clicking Edit.
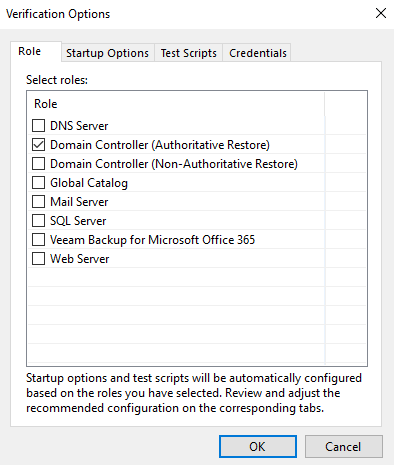
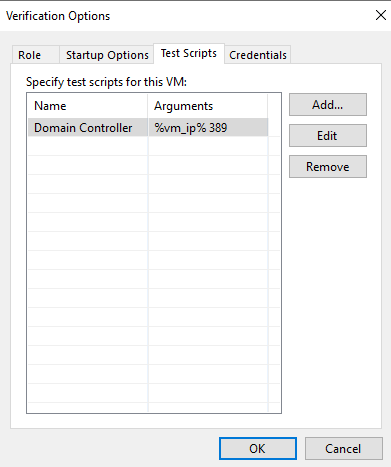
- In this example the VM is a Domain Controller. If we switch to the Test Scripts tab, we can see this has added a test for port 389. Additional and custom tests can also be added here by choosing Add.
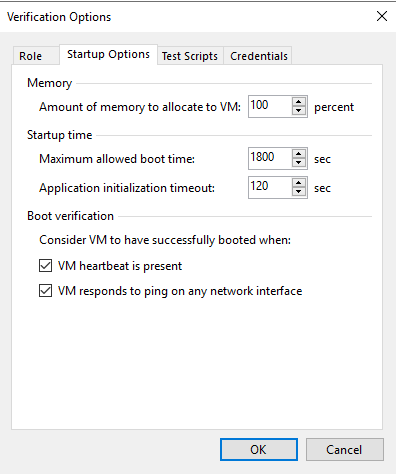
- The Startup Options tab also has some further per-VM customisations. We can reduce the memory, or increase the time for the checks if we know a particular VM takes a while to boot. Also it’s possible to disable the default heartbeat/ping checks if needed for a VM:
SureBackup Job
Once the Application Group and Virtual Lab are created, a SureBackup job can be created to execute the verifications.
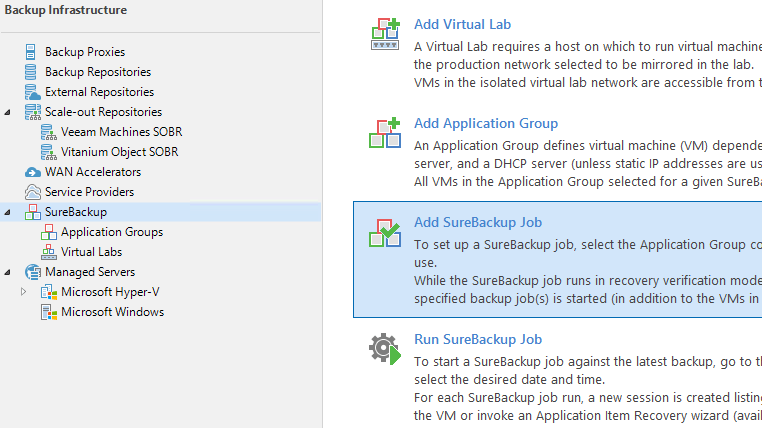
- Return to Backup Infrastructure -> Sure Backup and choose Add SureBackup Job
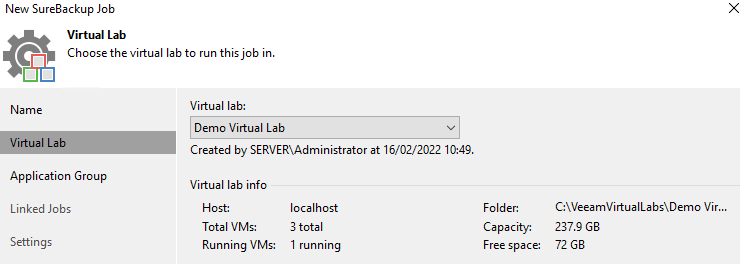
- Give the job a meaningful name, and select the Virtual Lab just created.
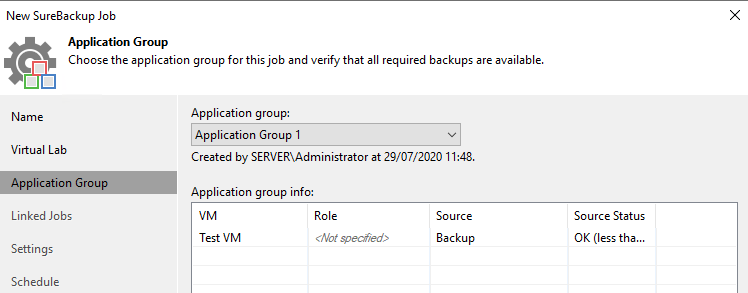
- Select Next and choose the Application Group just created.
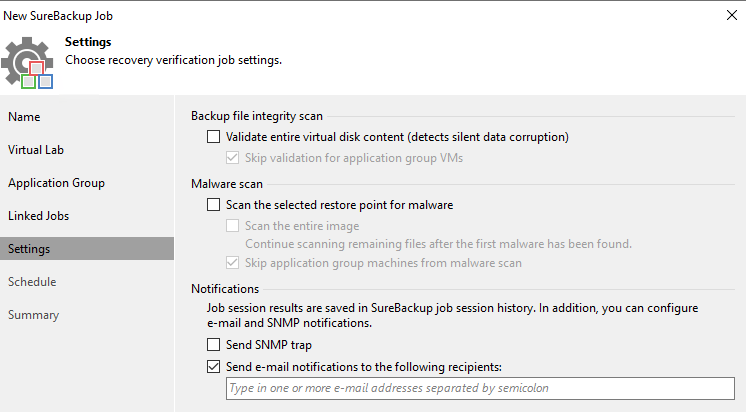
- On Settings, leave the defaults unless you wish to validate the entire virtual disk and/or scan for malware – this will take more time.
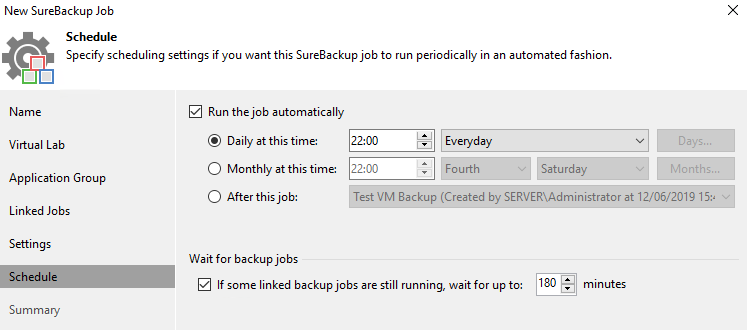
- Choose a schedule for the job to run as needed automatically. It’s best for this to be outside of the backup window if possible. You can also choose to run it after a backup job – so it could verify the backup immediately after it has been created.
Complete!
The SureBackup job will run on the schedule automatically as specified, significantly reducing the manual burden of testing backups are valid. If any of the VM’s within a job fail any of the tests, an email notification is sent using the same details as the main backup reports. This makes it easy to pickup on a hidden backup issue before it ever causes a problem in a restore scenario.
If you have any queries or need assistance setting up SureBackup, feel free to contact our friendly support team.